
Camp life
The best camping hammocks for a night between the trees
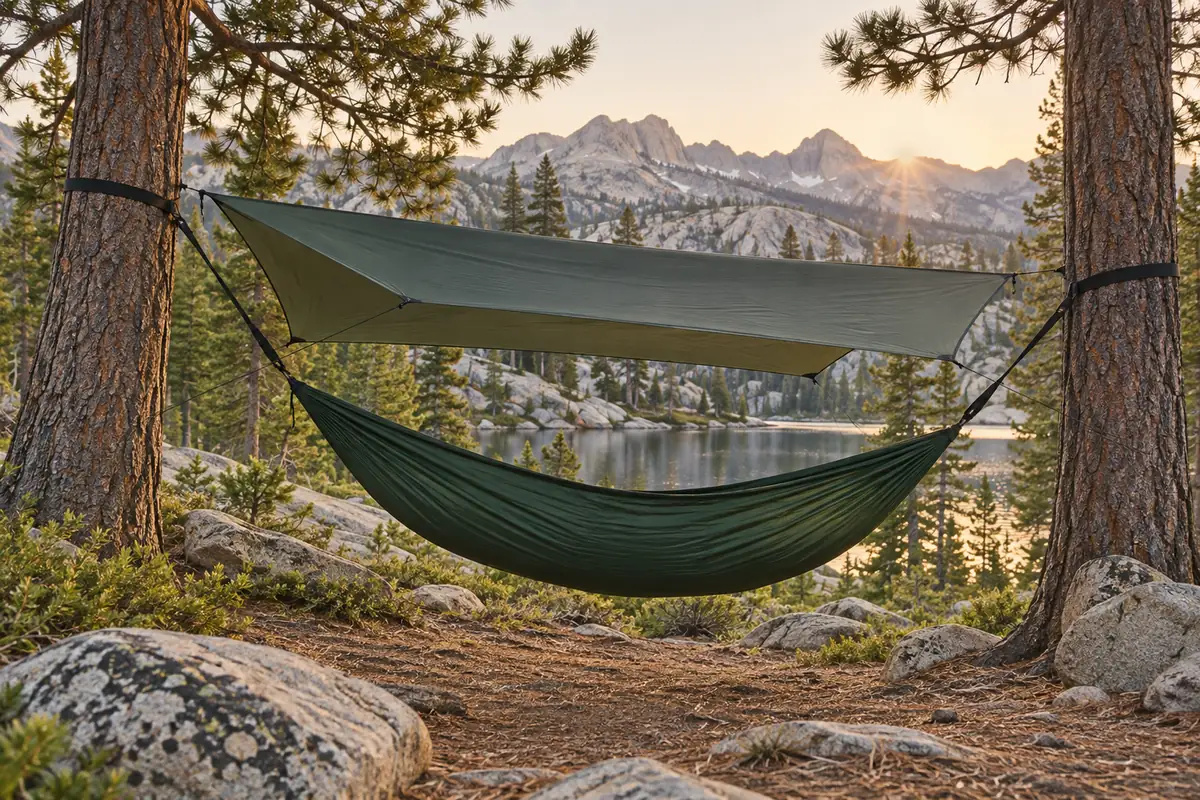
A hammock that feels great for twenty minutes can be a poor bed for the night. The best camping hammocks need enough room to lie well, a way to keep bugs out, and a shelter plan for rain and cold. The fabric between the trees is only the start.
I would choose the Warbonnet Blackbird XLC if you want to build a sleep setup around a roomy hammock. For a simpler first kit, the Hennessy Expedition Zip includes more of the shelter in one purchase. Either way, leave room in the budget for warmth underneath you.
Compare the whole shelter
| Camping hammock | What to know first |
|---|---|
| Warbonnet Blackbird XLC | Roomy bed with a shelf; choose the suspension, tarp, and insulation carefully |
| Hennessy Expedition Zip | Rainfly and webbing included; listed for users up to six feet and 250 pounds |
| ENO JungleNest | Netted hammock; compatible straps, tarp, and insulation cost extra |
| Kammok Mantis UL | A light kit with net, tarp, and straps; official listing currently sold out |
The first three are the ones I would compare for a near-term trip. The Mantis UL stays here as a useful lighter-kit alternative to watch. I would not plan a departure around a restock that has no firm date.
1. Warbonnet Blackbird XLC
The current Blackbird XLC is a Gen 3 model with a removable bug net, shaped sleeping space, and a side storage shelf. I like the separation between the bed and small items you want within reach. A headlamp or spare layer should not have to sit under your hip.
Warbonnet offers several fabric and suspension choices. That means there is no single complete weight or final price that describes every XLC. Check the exact build, including whether you have selected a usable suspension rather than loops alone.
This is my choice for someone happy to put a kit together. The tarp and insulation are separate purchases, and the total can rise quickly. The reward is control over the parts. The cost is more decisions before the first night.
Choose it for: a roomy system you can shape around your trips. Tradeoff: more work and cost to complete the shelter.
What I like
Side storage shelf; Choice of fabric and suspension.
Keep in mind
Total cost depends on the build; Tarp and insulation are extra.
2. Hennessy Expedition Zip
The Expedition Zip is my simpler starting point for a new hammock camper who fits its size limits. It includes an attached insect net, rainfly, support ropes, stuff sack, and webbing straps. You still need insulation and a suitable place to hang it.
Hennessy lists a height limit of six feet and a weight limit of 250 pounds. The packed weight is two pounds, twelve ounces before the three-ounce webbing straps. Count those straps in your carried weight instead of comparing the smaller figure with a complete kit.
The side zipper gives access to the bed, and the asymmetric shape supports a diagonal position. I would try that position before committing to a long trip. The included rainfly is a compact one, so think about the sheltered area you want around the hammock.
Choose it for: fewer separate shelter purchases. Tradeoff: a heavier package and firm height and weight limits.
What I like
Rainfly and webbing included; Attached insect net.
Keep in mind
Six-foot height limit; Heavier packed system.
3. ENO JungleNest
The JungleNest is a ten-foot hammock with a stowable insect net, a structural ridgeline, and a small spreader bar that lifts the mesh near your head. ENO lists a weight of twenty ounces and a 300-pound limit.
The spreader bar supports the canopy. It does not make this a bridge hammock with a flat bed. That distinction matters if you are choosing by shape rather than by brand.
Compatible suspension straps are sold separately, as are rain cover and insulation. I would consider the JungleNest if you want a simple netted hammock and are happy to build the rest of the kit. I would add up the complete cost before comparing it with a bundle.
Choose it for: a straightforward bug-net hammock. Tradeoff: the hammock price leaves out several overnight essentials.
What I like
Stowable insect net; Light canopy spreader bar.
Keep in mind
Straps sold separately; Tarp and insulation are extra.
4. Kammok Mantis UL
The Mantis UL brings the hammock, removable bug net, rainfly, straps, stakes, and stuff sack together. Kammok lists a total packed weight of two pounds, four ounces. The lower trail-weight figure leaves parts out, so I would use the complete number when planning a pack.
The bed is ten feet long, with a 300-pound weight limit. A structural ridgeline helps keep the bed shape consistent. The twenty-denier fabric is part of the weight saving, which makes careful handling worth the effort.
The official listing is currently sold out. I would keep it on a shortlist for a later trip, or check an authorized shop's exact model and return policy. I would not pay a large premium just because a light kit is hard to find.
Choose it for: a lighter kit when stock is available. Tradeoff: current availability and a bed that may feel short to taller sleepers.
What I like
Straps and rainfly included; Removable bug net.
Keep in mind
Official listing currently sold out; Ten-foot bed may feel short to tall campers.
A camping hammock needs more than a wide bed
Width matters, but length, fabric stretch, and the hang shape matter too. A double hammock may be wide enough for two people to sit together. That does not make it a good two-person bed.
I would plan one sleeper per hammock unless the system is expressly designed for something else. Sharing a gathered-end bed can push both people toward the middle and make every turn affect the other sleeper.
Try the diagonal position
In many gathered-end hammocks, lying a little across the centerline gives a flatter position than lying straight down the curve. Your head goes to one side and feet to the other. Do not force an extreme angle; follow the maker's setup guidance.
A side sleeper may find that position comfortable, or may still prefer a tent and sleeping pad. A short shop sit cannot settle the question. Try a full night close to home with an easy way to change plans.
Length changes the feel
A longer hammock can give a tall sleeper more room to find a useful diagonal. It also needs suitable tree spacing and a tarp that covers the bed. Do not buy length without checking the whole setup.
In campers' discussions of hammock sleep systems, one rider describes a much better sleep after moving to a longer bed. The same person also learned that an underquilt was needed. It is one user's experience, but both questions are worth settling before a trip.
A weight limit is not a comfort rating
Stay within every component's limit, including the hammock, straps, and connectors. That is a safety boundary. It does not tell you whether the bed will feel spacious, firm, or comfortable for your body.
Check height guidance as well. A hammock can support your weight and still feel too short. Fit and load limits answer different questions.
Bug nets: attached, removable, or separate?
A bug net is worth planning before the insects arrive. An integrated bug net saves a separate piece to pack and helps keep the mesh in place. A removable net gives more freedom when bugs are absent.
Attached bug nets
An attached net is always with the hammock. That is useful if you tend to forget small parts. It can be less flexible if you want to use the hammock as a simple open lounger.
Removable bug nets
A removable bug net can come off for a clear, bug-free night. Keep the net and its small parts together, and learn how it attaches before you need to do it in fading light.
Separate nets
A separate net can work with a hammock you already own. It adds another item and may need its own hanging steps. Check that it closes fully and leaves enough room around the bed without dragging on the ground.
Give the mesh room
A net that presses against your face is hard to enjoy. A structural ridgeline or canopy support can help keep it away. Close the zipper without pulling hard on strained mesh, and inspect small holes before packing.
Warmth underneath is the easy thing to miss
A sleeping bag gets warmth from trapped air in its insulation. Your weight flattens the part beneath you. In a hammock, air can move under that compressed layer, so a warm sleeping bag alone may leave your back cold.
I would choose bottom insulation as carefully as the hammock. An underquilt or a suitable sleeping pad can help, but each has fit and use limits. Match the system to the expected low temperature and your own sleep needs.
Underquilts
An underquilt hangs outside the hammock, below your body, so its insulation can keep some loft. It needs a close fit without large air gaps. Pulling it too tight can compress the insulation and reduce the benefit.
Check the quilt's length, shape, and attachment method against the hammock. A quilt that fits one bed well may need more adjustment on another. Keep it dry while setting up and packing.
Sleeping pads
A sleeping pad can be a useful starting point if you already own one. In a single-layer hammock, it may slide or curl as you move. A double-layer hammock can give the pad a pocket, though the fit still needs a real check.
Make sure your shoulders and hips stay on the insulated area. A pad that looks wide enough on the floor can feel narrow when the hammock wraps around it.
Top insulation
A sleeping bag or top quilt covers the upper side of your body. Pick enough warmth for the trip, including a margin for your own needs. Do not treat a warm afternoon as proof that the night will stay mild.
Cold-weather hammock camping
Cold weather adds less room for mistakes. Wind, damp gear, and gaps in bottom insulation can turn a small setup problem into a serious one. Build experience in mild conditions first and keep a reliable backup plan.
Choose rain cover around the whole hammock
A rainfly should cover the hammock and leave enough margin for rain that comes from the side. More coverage can create a dry place to sort gear. It also adds fabric, packed size, and weight.
Compact tarps
A small rain tarp can suit fair-weather trips with a sheltered site. It leaves less room for a wind shift. I would not choose the smallest tarp just because its weight looks good beside a tent.
Larger tarps
A larger tarp gives more room around the bed and may offer better protection from angled rain when pitched well. Make sure you can tension it with the available trees and ground space. Loose fabric can flap, sag, or collect water.
Rain can follow the suspension
Water may run along a suspension line toward the hammock. Follow the maker's advice for keeping that water outside the covered area. Practice the rain setup with the actual straps and tarp rather than treating each part as a separate purchase.
Keep wet and dry gear apart
Pack the wet tarp separately from your sleep gear when possible. At camp, put the tarp up before exposing dry insulation to rain. On the walk in, keep a useful pair of rain pants easy to reach so the clothing you arrive in is not needlessly soaked.
Straps, ropes, and the parts that hold you up
The suspension connects the hammock to the trees. It may use webbing straps, buckles, ropes, or adjustable loops. Buy compatible parts and follow the instructions for that exact system.
Wide tree straps
Use suitable tree straps and protect the bark as local rules require. Thin cord wrapped around a trunk is not a substitute for a tree-friendly attachment. Check the width and padding rules for the campground before leaving.
Do not assume loops are a complete system
Some hammock choices include only short loops at the ends. Those loops still need a way to connect to trees. Read the included-parts list closely, especially when a product has several suspension choices.
Hang low and check the site
Choose healthy trees and inspect above and around the site for hazards. Keep the hammock low enough that a fall would be limited, follow the maker's height guidance, and keep hard objects out from under it.
Do not hang over water, steep drops, or sharp rocks. Check the straps, connectors, and fabric before putting your full weight in. A beautiful view is not a reason to accept a poor site.
Let the hammock keep its curve
Pulling a gathered-end hammock tight like a wire changes both comfort and the forces on the system. Follow the suggested hang angle and ridgeline guidance. A controlled curve is part of how the bed works.
Can you hang a hammock at your California campsite?
Check the rule for the exact campground or land manager. The presence of trees does not establish permission. Some sites have too few suitable trees, sensitive vegetation, or rules that limit attachments.
For example, Yosemite's campground rules allow hammocks when they do not create a hazard and ask visitors to pad trees against damage. That is a campground rule, not a blanket rule for every place in California.
Have a ground-sleeping plan where needed
Open country and high-elevation sites may have no usable trees. A hammock trip needs a route and camp plan that support hanging. If that is uncertain, carry a complete alternative you know how to use or choose a ground shelter from the start.
Respect the space around the bed
Keep lines out of paths and shared areas. Make them easy to see. A low hammock still needs clear space around the tarp and guy lines, especially after dark.
Compare packed weight honestly
A bare hammock may be light. Add the bug net, rainfly, tree straps, connectors, stakes, stuff sacks, and insulation, and the total can be close to a tent setup. That does not make the hammock a bad choice. It makes a complete comparison necessary.
| Count this part | Why it belongs in the total |
|---|---|
| Hammock and bug net | The bed and insect protection |
| Suspension and tree straps | The parts needed to hang it |
| Tarp, lines, and stakes | The full rain shelter |
| Bottom and top insulation | The complete sleep warmth |
| Storage and repair items | The small parts you will carry too |
Pack the whole kit before choosing a bag. My guide to hiking backpacks explains why a volume number alone can miss bulky sleep gear. An underquilt may take more room than the hammock itself.
Make the first night an easy one
I would start near home or the car, in mild weather, with time to change the setup before dark. Learn the suspension, bug net, tarp, and insulation as one system. Keep food and scented items stored under the site's rules, away from the bed.
Notice what wakes you. Is the pad moving? Is the quilt leaving a gap? Are your feet too high or the mesh too close? Change one thing at a time so you learn what helped.
What does a complete hammock kit include?
A complete kit should get you from suitable trees to a protected bed with fewer separate purchases. Check the parts, though: even a kit with a rain fly and bug net usually needs insulation. The best camping hammocks make sense only when the full shelter system fits your trip and budget.
The hammock body
The hammock body is the fabric that holds you. Check its length, width, fabric choice, and weight limit. A wide hammock body can feel roomy for sitting but still leave a tall sleeper short of space along the diagonal.
A usable suspension system
The suspension system needs every part required to join the hammock to suitable anchors. End loops alone do not complete that job. Look for compatible tree straps, connectors, and any adjustment parts. Keep each component within its own load limit.
A bug net that closes fully
An integrated bug net is convenient because it travels with the hammock body. A removable bug net gives more freedom to lounge without mesh overhead. Either way, test the closure and check for gaps where the net meets the ends.
A rain fly and its lines
The rain fly needs its own lines and ground anchors where the design calls for them. A tarp without guy lines or enough tent stakes is an incomplete shelter. Check the number of corners and tie-outs you plan to use.
Insulation above and below
A sleeping bag covers you, but your body compresses the insulation under your back. An underquilt or suitable sleeping pad handles that lower side. A rain tarp and bug net provide weather and insect cover, not the warmth of a full sleep system.
The price after the missing parts
The Hennessy Expedition Zip is listed at $169.95 with a rainfly, webbing, ropes, net, and stuff sack. The Blackbird XLC starts at $200 before the final build and extras. The Kammok Mantis UL listing is $319.95, but it is currently sold out.
Those prices describe different packages. Add the cost of the missing suspension system, rain tarp, and insulation before choosing an affordable hammock. A lower hammock-only price can become a higher complete-kit price.
Car camping and backpacking ask different things
For car camping, favor space and easy adjustment
Car camping gives you more freedom to carry a roomy tarp and extra comfort items. A few more ounces matter less when the car is nearby. I would give a forgiving suspension system and easy bug net access more weight than finding the lightest hammock.
Still check the campsite rules before packing. Car camping does not guarantee suitable trees inside the assigned space. A portable stand needs its own load rating and a level, permitted site; do not assume any stand fits any hammock.
For a backpacking hammock, weigh every part
A backpacking hammock must carry its entire shelter system down the trail. Add the hammock body, bug net, suspension straps, rain fly, lines, stakes, insulation, and stuff sacks. Compare that total with the ground shelter you would otherwise carry.
The lightest hammock body may need heavier extras. The Kammok Mantis UL packages several parts together, while the Blackbird XLC lets you choose more of your own kit. Neither approach removes the need to count the full load.
For group trips, plan separate sleeping spaces
A double hammock can work for shared lounging within its limits. Overnight, most gathered end hammocks work better with one sleeper because both bodies roll toward the low point. Do not treat a high weight limit as proof of a comfortable two-person bed.
Separate camping hammocks also need separate suitable hanging spaces. Plan the number of trees and the tarp lines, rather than assume a group can stack several beds around the same small pair of trunks.
Understand the shape before you adjust it
Gathered end hammocks keep a curve
Gathered end hammocks draw the fabric together at each end. Their natural banana shape is part of the design. A gentle diagonal lay can give you a flatter body position without pulling the hammock body tight.
Many adult camping hammocks are around ten to eleven feet long. More length can help a tall sleeper find room, but length alone does not guarantee comfort. Try the full bed shape and follow the maker's height guidance.
A structural ridgeline helps repeat the hang
A structural ridgeline connects the ends and helps keep the amount of sag consistent. It makes it easier to recreate a useful hammock shape between different trees. It is not a license to ignore the setup instructions or over-tighten the suspension system.
The ENO JungleNest and Kammok Mantis UL include a ridgeline. If a different system uses an adjustable ridgeline, learn the maker's intended range before changing it. Small changes can affect the feel more than you expect.
A canopy spreader bar is not a flat bed
The small spreader bar on the ENO JungleNest lifts the bug net away from the head area. It supports mesh, not your body. A bridge hammock uses a different shape and load-bearing bars to spread the bed.
Do not compare these designs by the words spreader bar alone. Check where the bar sits and what it holds. A canopy bar can make the space feel more open without removing the curve of a gathered-end hammock.
Side pulls make space for the bug net
Where the design includes side pulls, they can help keep the bug net away from your face. Use the supplied adjustment method and avoid pulling mesh seams tight. A bug net is a light enclosure, not a load-bearing wall.
Sleeping pad or underquilt?
A foam pad is a simple starting point
A foam pad can add insulation beneath you without an air valve or pump. It may shift when you turn, and the hammock can bend its edges inward. Try it at home so you know whether your shoulders remain over the insulated area.
Inflatable pads need a fit check
Inflatable pads can feel different in a curved hammock than on flat ground. Their shape may push against the sides or move beneath you. Follow the pad and hammock makers' instructions, and test the combination before counting on it for cold weather.
A double layer hammock can help hold a pad
A double layer hammock has another fabric layer beneath the sleeper. Some designs use that space to hold a sleeping pad more steadily. The extra layer adds weight, and pad fit still matters. Check whether the particular model is designed for that use.
An underquilt leaves the bed clear
An underquilt hangs below the hammock body, so there is no pad to slide under your hips. It needs a close fit to limit drafts without crushing its loft. Check the ends after getting into the hammock, because body weight changes the shape.
For winter camping, use a system suited to the expected conditions and your experience. Do not discover a large insulation gap miles from a reliable backup. Comfortable hammocks still need warm, dry sleep gear.
Choose suspension you understand
Webbing straps and buckles
Webbing straps spread contact over a wider area of bark than thin rope. Buckles can make adjustment clear, but the webbing must be threaded correctly. Follow the exact diagram and check for twists before sitting down.
Whoopie slings and other adjustable loops
Whoopie slings use adjustable cord loops as part of a suspension system. They can save weight, but they still need compatible tree straps and correct setup. Learn the adjustment and minimum lengths from the maker, rather than copying an unfamiliar knot from a photo.
Strap length is a site question
Short suspension straps may work around one trunk and fail to reach around another. Check the likely tree size while respecting local protection rules. Bring a compatible system with enough adjustment, not loose cord intended to improvise around any tree.
Keep spare parts with the system
Store connectors and small suspension parts in the same place each time. A separate labeled pouch can help if you use several camping hammocks. Check the pouch before leaving, since a missing connector can make a whole shelter unusable.
A simple routine for a wet camp
Choose the site before opening dry gear
Check tree health, ground hazards, lines of travel, and the space for the rain fly. Avoid low spots where gear left on the ground may sit in runoff. Keep the sleeping bag sealed while sorting out the hang.
Pitch the rain tarp first
When rain is falling, put up the rain tarp before exposing the hammock and insulation. Tension the guy lines as the design requires. Make sure the covered area suits the whole hammock body, including rain coming at an angle.
Keep small gear within reach
A built-in shelf, pocket, or separate gear sling can keep light items off damp ground. Respect each part's load limit. Keep shoes and other hard items out from directly beneath the bed so they do not become a hazard if something slips.
Pack the wet fabric last
Seal the dry sleep gear before taking down the rain fly. Keep the wet tarp and tree straps apart from the sleeping bag. At home, empty every stuff sack and dry the whole shelter system before storing it.
When hammock camping makes sense
The best camping hammocks suit trips with permitted, suitable trees and a sleep system you already know. Hammock camping can give you a bed above uneven ground, but that benefit comes with a need to plan anchors, weather cover, and warmth. The ground beneath still needs to be free of hazards.
Start with car camping
For a first night of hammock camping, car camping makes it easier to change plans. Bring a complete backup sleeping setup and use a site close to help. Spend time adjusting the hammock body, bug net, and suspension system before darkness makes every small task harder.
A first hammock setup should be simple enough that you understand each part. Read the instructions at home, then check them again at camp. An integrated bug net can save a setup step, but the rain fly and insulation still need attention.
Move to a backpacking hammock after a full night
Before relying on a backpacking hammock away from the car, settle whether you can sleep comfortably in it. Try turning over, reaching a headlamp, opening the bug net, and getting out in the dark. These are ordinary parts of a night, not small extras.
Comfortable hammocks can still feel wrong for a particular sleeper. If a sleeping pad shifts or the hammock body presses at the shoulders, change one part at a time. Do not buy more hammock gear before identifying what is causing the problem.
Choose a tent when the route calls for one
Hammock camping is a poor fit when suitable anchors are uncertain or local rules prohibit hanging. A backpacking hammock is not a ground tent just because it has a bug net. Choose a complete ground shelter when that is the more reliable match for the route.
Use ultralight hammocks with a clear purpose
Ultralight hammocks can cut the carried load, but thin fabric and compact rain cover leave less room for careless use. Consider the full shelter system, including the suspension system and bottom insulation. The best camping hammocks earn their weight by helping you sleep well.
For car camping, I would keep useful space and simple adjustment before paying more to save a small amount of weight. For a backpacking hammock, I would compare the full packed total and check that none of the missing parts still needs buying.
Keep the simple comfort items
A dry place for shoes, a reachable light, and a clear route out from under the tarp can improve a night of hammock camping. A small gear sling may help keep light items organized. Keep it within its rating and separate from the space directly beneath the bed.
It is easy to focus on the hammock body and forget the routine around it. A familiar suspension system, a bug net that opens easily, and a rain fly you can pitch well are often worth more than one impressive specification.
Questions worth settling before a trip
Is a hammock more comfortable than a tent?
For some sleepers, yes. Others prefer a flat pad on the ground. Body shape, sleep position, hammock length, and setup all affect the result. Try a full night before taking it far from a backup bed.
Does a bug net make a complete camping hammock?
No. A bug net handles insects. You still need compatible suspension, rain protection when required, and enough insulation for the night. Check each part even when the listing uses the word complete.
Can a double hammock sleep two adults?
Many double hammocks are wider loungers intended for one sleeper. Check the maker's intended use and limits. I would use separate beds for overnight comfort unless the system is designed for two.
Which camping hammock would I choose?
I would choose the Blackbird XLC for a roomy, tailored setup. The Expedition Zip makes the first shelter purchase simpler if you fit its limits. The JungleNest suits someone building around a netted hammock, while the Mantis UL is worth revisiting when stock returns. Spend as much care on the tarp and bottom insulation as on the bed. Those parts decide a lot about the night.