
Pack & carry
The best hiking backpacks for a day out or a night away
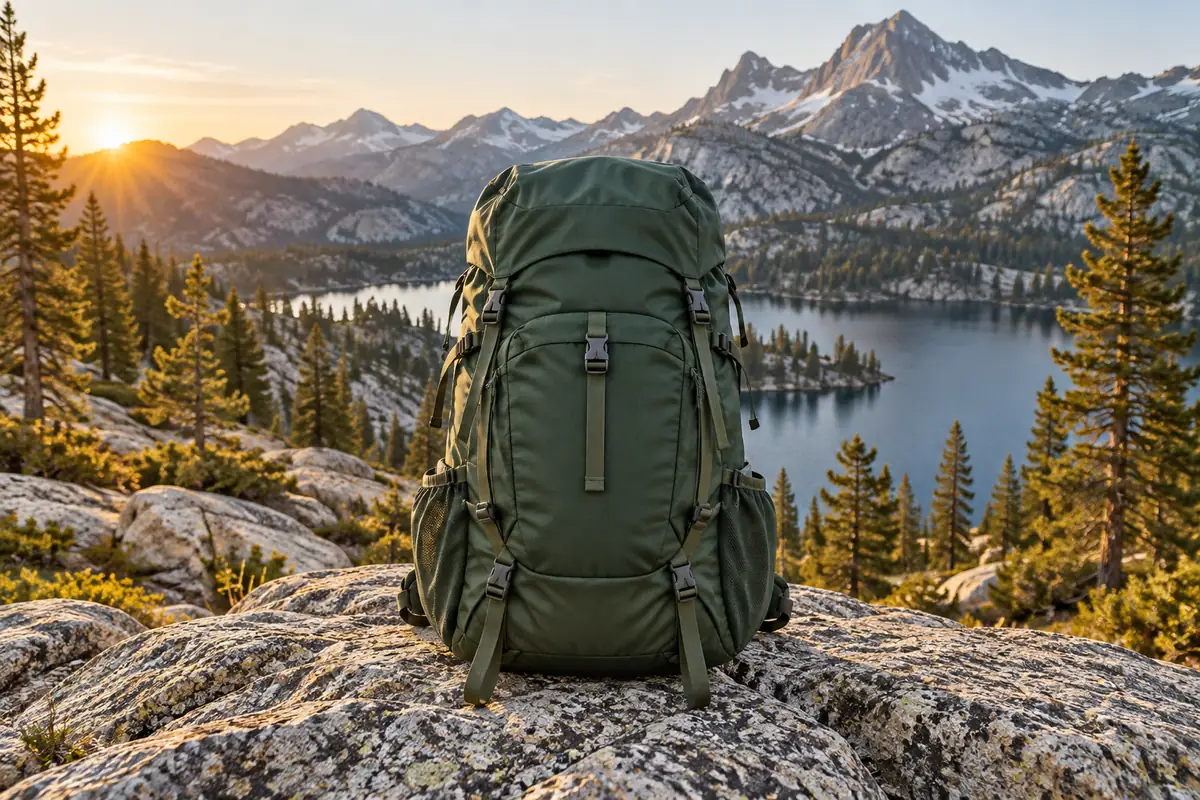
A hiking backpack should make the load easier to carry, not give you more space to fill. The first choice is simple: are you coming home tonight? A daypack and an overnight pack can both be excellent, but they solve different problems.
For an overnight trip with a fairly compact kit, I would start with the REI Co-op Flash 55. For a day hike, I would try the smaller Osprey Talon 22. The best hiking backpacks are the ones that fit your body under the weight you will carry, so neither recommendation replaces a loaded fitting.
Choose the trip before the pack
| Backpack | Best fit for the job |
|---|---|
| REI Co-op Flash 55 | A lighter overnight kit with useful pockets and fit adjustment |
| REI Co-op Trailmade 60 | First overnight trips and easier access to buried gear |
| Granite Gear Crown3 60 | Changing the lid and frame setup as the load changes |
| Osprey Talon 22 | Day hikes with water, food, layers, and essentials |
The sizes in the names are a starting point. Pack makers do not always count space in the same way, and some sizes within one model have different volumes. Check the exact version, then put your own gear inside it.
1. REI Co-op Flash 55
The Flash 55 earns my first look for a lighter overnight kit. The current men's medium holds 55 liters and weighs two pounds, thirteen ounces. An adjustable torso and several size choices give you more room to work on fit than a single fixed harness.
REI lists nine exterior pockets plus the main space, including hip belt pockets. That is useful if you like to keep water, snacks, and a wet layer away from the sleeping bag. The rain cover is sold separately.
I like this balance more than a race to the lowest pack weight. Still, a light pack needs a sensible load. Add several days of food and a long water carry before you decide how it feels. Those pounds matter more than how comfortable the empty pack is.
Choose it for: a compact overnight kit. Tradeoff: light fabric calls for care around rough rock and brush.
What I like
Adjustable torso; Useful pocket layout.
Keep in mind
No rain cover included; Light fabric needs care.
2. REI Co-op Trailmade 60
The current Trailmade 60 is the pack I would try if easy access matters more than shaving every ounce. Its large U-shaped zipper gives another way into the main bag, so you do not have to unload everything from the top to reach one item.
The linked men's version has a 60-liter capacity, an adjustable 17-to-21-inch torso range, and two hip belt ranges. The larger belt extends to 53 inches. Listed weight starts at three pounds, five ounces, and a rain cover is not included.
The extra access makes sense for occasional trips and a kit that is still changing. I would accept the weight if the pack fits well and makes camp less of a rummage. I would not buy the larger bag just to avoid deciding what to leave home.
Choose it for: a first overnight setup and easy gear access. Tradeoff: more empty pack weight than the Flash 55.
What I like
Large U-shaped opening; Extended hipbelt choice.
Keep in mind
Heavier than Flash 55; No rain cover included.
3. Granite Gear Crown3 60
The Crown3 60 gives you several ways to adjust what you carry. The lid and frame sheet can come out, and Granite Gear offers an extra aluminum stay for heavier loads. The hip belt adjusts, but the torso length is fixed within each of three sizes.
Granite Gear lists the regular pack at 2.4 pounds without the lid. That detail matters: do not compare it with another pack's complete weight as if both figures cover the same parts. The listed load ratings also change with the frame setup.
I would choose the Crown3 for someone who enjoys refining a kit and understands the tradeoff when parts come off. Removing the frame saves weight, but it also changes the way the pack supports a load. Keep the frame when your gear needs it.
Choose it for: a flexible overnight setup. Tradeoff: more choices to manage, and no sliding torso adjustment.
What I like
Removable lid and frame sheet; Adjustable hipbelt.
Keep in mind
Fixed torso size; Several configurations to compare.
4. Osprey Talon 22
The Talon 22 is my day-hike choice here. The current model holds 22 liters and uses a close-fitting AirScape back panel, a linked harness and hip belt, and zip access to the main space. It is built to move with you rather than stand far away from your back.
Osprey lists side mesh pockets, hip belt pockets, a front stretch pocket, and attachments for poles and a bike helmet. Its listed weight is 2.38 pounds, so it is not the lightest small bag. I would buy it for fit and control.
The limit is space. A daypack should hold your water, food, spare layers, and essential gear without forcing items into loose bundles outside. If the kit barely fits at home, a colder or longer day may need a larger pack.
Choose it for: day hikes with a close-fitting load. Tradeoff: too little room for most overnight kits.
What I like
Close-fitting harness; Zip access.
Keep in mind
Too small for most overnight kits; Not the lightest daypack.
Fit comes before a favorite brand
I would narrow the field to packs that suit the trip, then forget the logo for a while. A fine backpack can still be a poor match for your torso, hips, or shoulders. More padding does not automatically fix that.
This comes through clearly in hikers' accounts of backpack fit. Several describe liking a brand's quality but disliking how its packs sit on their bodies. That is useful context, not a reason to copy someone else's choice.
Measure torso length, not height
Two people of the same height can need different pack sizes. Torso length describes the distance along your back that the harness needs to fit. Use the maker's fitting steps or ask a trained shop fitter to help.
The REI backpack sizing guide explains torso and hip measurements and why the hip belt matters. Treat the measurements as a way to choose what to try, then confirm the result under load.
Set the hip belt first
Center the padded part of the belt over the top of your hip bones. Fasten it snugly enough to hold some weight without pinching. You should have room to tighten and loosen it after adding or removing a layer.
If the padded ends nearly meet before the belt is firm, the belt may be too large. If the padding stops far behind the front of your hips, it may be too small. Check the pack's fit guidance for the intended position.
Then adjust the shoulder straps
Draw the shoulder straps in until they follow your shoulders without hauling the hip belt upward. A large gap, hard pressure point, or strap that cuts into the neck needs attention. Do not solve every fit problem by pulling harder.
Use load lifters with care
Load lifters connect the upper shoulder straps to the top part of many overnight frames. Small changes can bring the load closer. Pulling them too tight can change the shoulder fit and make the pack feel worse.
A sternum strap helps control where the shoulder straps sit. It should leave you free to breathe. Neither strap can turn the wrong torso size into the right one.
A useful loaded-pack check
An empty backpack tells you little about comfort. Pack the weight you expect at the start of the trip, including water and food. That is usually the hardest load the bag has to carry.
- Put bulky soft gear low, with the heavier items close to your back.
- Set the hip belt, shoulder straps, and other fit controls.
- Walk, turn, step up, and bend to reach a shoe.
- Check for rubbing, slipping, and pressure that grows over time.
- Try reaching a bottle or snack without forcing your shoulder.
Keep the test indoors while you check a shop's return rules. A few steps are not a full trail test, but they can rule out a bad fit before you own it.
Watch for movement
A pack that swings away from your back can pull you off balance. A pack that is strapped too tightly may limit movement. Aim for a load that stays close while you breathe and step freely.
Give pressure points time to appear
Leave the pack on long enough to notice what changes. A belt can feel soft at first and then press on one spot. A shoulder strap can feel fine until you raise an arm. These small checks matter more than the color.
How much pack space do you need?
I start with the gear pile, not a liters chart. Lay out what the trip requires, then check how much room it takes. A bulky sleeping bag, a bear canister, or shared gear can change the answer more than the number of nights.
Day hikes
A daypack needs room for the full day, not just the walk out. Water, food, warm layers, rain cover, navigation, and other essentials take space. Leave room to put a layer away once you warm up.
The Talon 22 works as a starting point for a compact day kit. It is not a promise that 22 liters will fit every season or every route. If the essentials do not fit, choose more space.
Overnight trips
Once you add shelter, sleep gear, and food, the volume rises. A lighter, compact kit may fit a smaller overnight pack. A bulkier kit may need the room of a 60-liter bag even for one night.
If you are changing shelters, compare the packed size of the whole system. My camping hammock guide includes the tarp, straps, and insulation that can disappear from a headline weight. All of those parts still need a place in your pack.
Long water carries
Water can be a large part of the load on a dry route. Check both capacity and access. A bag with room for bottles is not useful if the extra weight makes it painful to carry.
Keep the heaviest water close to your back and secure. Do not leave a full bottle swinging from a long clip on the outside. Test the load with the amount your route requires.
Bear canisters and other fixed shapes
A hard food container does not shrink as you eat. Put the exact size you need into the pack before buying. Check whether it fits in a sensible position without pressing a hard edge into your back.
For Yosemite trips, read the park's food-storage and bear-container rules. Required food storage is part of the kit, not an extra to squeeze in after the pack is full. Follow the rules for the place you are visiting.
Low pack weight is useful, up to a point
A lighter empty bag reduces the load. That is a real gain. But a bag with too little support for your gear can feel worse than a heavier one with a well-fitted frame and hip belt.
I would compare total pack weight: the bag plus everything inside and outside it. Saving half a pound in the pack means less if it makes the other thirty pounds harder to carry.
Check what the listed weight includes
Does the number include the lid, frame, hip belt, rain cover, and extra straps? The Crown3 is a good example of why this matters. A stripped weight and a complete weight answer different questions.
Use the configuration you plan to carry. Removing a pocket for a weigh-in and putting it back on for the hike does not save any trail weight.
Ultralight packs need a matching kit
Many ultralight packs work best after the rest of the gear is compact and light. A frameless pack is not a shortcut around a heavy load. Reduce unneeded items first, then see whether a lighter pack still gives enough support.
I would keep a frame and a useful hip belt for a beginner's overnight kit unless a loaded check gives a clear reason to do otherwise. Comfort over a long day is worth more than winning an empty-bag comparison.
Pockets should solve your own habits
More pockets can make a pack easier to use, or give you more places to lose a small item. Think about what you reach for while walking and what can wait until camp.
Hip belt pockets
These are useful for a small snack, lip balm, or other light items. Check them while the belt is fastened. A pocket can look large when the pack is flat and become much harder to use when it curves around your hips.
Water bottle pockets
Test a side pocket with your own bottle. Can you reach it? Does it hold the bottle when you lean over? Some people prefer a reservoir and hose, while others want bottles they can see and refill easily.
Front stretch pockets
A front mesh pocket can keep a damp layer outside the dry gear. It is also an exposed part of the pack. Avoid stuffing sharp tools into stretch fabric or dragging it against rough rock.
Lid and inner pockets
A lid pocket is a useful home for small things you need at stops. An inner zip pocket can keep keys from falling into the main bag. Pick a simple system and use the same place each time.
Keep sleep gear dry inside the pack
A water resistant backpack is not a dry bag. Seams, openings, and worn fabric can let water through. A rain cover helps protect the outside, but it does not seal every gap against your back.
I would give the sleeping bag and spare warm clothes their own dry protection inside the pack. A suitable liner or dry bags can help. Close them properly and keep sharp items away from the material.
Keep the shell easy to reach
Put rainwear where you can reach it without unpacking the sleeping bag. In changing weather, access is part of staying comfortable. My guide to waterproof hiking pants covers the fit and zip details worth checking before the first shower.
Dry the pack at home
Empty every pocket, loosen the straps, and let the pack dry before storage. Clean it using the maker's instructions. Check for trapped food and damp fabric rather than hanging it up full and forgetting it.
Use these sizes as starting points
A capacity range helps narrow the shop shelf, but your actual gear decides the final size. For many day hikes, 20 to 30 liters is a useful place to start. For an overnight or multi-day backpacking trip, roughly 50 to 65 liters gives more room for shelter, sleep gear, and food.
Short day hikes with a compact kit
A 15-to-30-liter hiking backpack can cover many short outings. The lower end fills fast once you add extra water or warm clothes. Put every required item in the bag before calling a smaller pack enough.
The Talon 22 sits in this daypack range. That makes it a useful candidate for day hikes, not a universal size recommendation. Carrying shared gear for a child or bulky winter layers can push the same walk toward a larger pack.
Weekend trips
A compact kit may fit a 40-to-50-liter backpacking backpack for weekend trips. If you use a bulky sleeping bag or carry a hard food container, start with more space. My overnight picks lean toward 55 to 60 liters to leave room for those common needs.
Long trips and cold-weather loads
Longer trips add food; colder trips add insulation. Packs of 60 liters or more can make sense, but liters do not tell you whether the frame can comfortably carry the load. Check both volume and the maker's load guidance.
Do not force a large pile of gear into a small bag by tying half of it outside. Loose bundles can swing, snag, or get wet. A hiking backpack should hold the planned kit in a stable way.
Frames, hip belts, and heavy loads
The best backpacking packs move much of the load through a frame and a supportive hip belt. Shoulder straps help control the bag and carry part of the load. How well those parts fit matters more than the thickness of a single pad.
What a frame changes
A frame gives a backpacking backpack structure between the upper bag and hip belt. It can help the bag keep its shape with a full food load. Frameless ultralight packs ask more of the way you pack and the amount you carry.
I would not remove a frame simply because the parts are removable. First bring down the rest of the load. Then check whether the lighter setup still feels stable without a hard edge pressing through the back panel.
Load limits change with the setup
The Granite Gear Crown3 60 makes this clear. Granite Gear lists a 25-pound limit without the frame sheet, 35 pounds with it, and 43 pounds with the optional aluminum stay. Those are three different configurations of the same pack.
A load limit is not a promise of comfort for every person. Stay within the guidance for the parts you use, then check the fit. If you regularly carry heavy loads above 40 pounds, load support deserves more attention than the lowest empty weight.
Ultralight backpacking comes from the whole kit
Some ultralight packs weigh around two pounds, but there is no single weight or capacity that makes a hiking backpack right for you. A light frame can still feel poor when the food and water load grows. The best backpacking backpacks for heavy loads may weigh more for a sound reason.
Ultralight backpacking starts with careful gear choices across the kit. A compact sleeping bag, suitable shelter, and fewer unneeded items change the load before the pack itself does. Keep the essential gear your route requires.
Do not use shoulder straps to rescue a loose belt
If the hip belt slides down, tightening the shoulder straps may only put more weight on the shoulders. Check the belt size, position, and torso fit first. Comfortable packs let you make small changes without one part of the harness fighting another.
Fit details worth a closer look
Adjustable torso length
Many adjustable backpacking packs move the point where the shoulder straps meet the back panel. That changes the harness length within a stated range. It does not make every pack fit every torso.
The REI Co-op Flash 55 and Trailmade 60 offer adjustment. The Granite Gear Crown3 uses a fixed torso size, so choosing the right size at purchase matters. All three still need a loaded fitting.
The hip belt range
The current Trailmade 60 offers standard and extended belt ranges. The linked extended version reaches 53 inches. Check where the padded sections sit as well as whether the webbing reaches the buckle. A belt can close and still place its padding poorly.
Shoulder shape
Shoulder straps should follow your shoulders without cutting into the neck or rubbing the upper arms. Different curves can feel quite different on the same torso. Try another harness shape if one strap edge keeps pressing even after adjustment.
Load lifters and head space
Use load lifters in small steps after setting the hip belt and shoulder straps. Then look up, turn, and raise your arms. A tall lid that hits your head or a hat brim can make an otherwise sound pack irritating.
Back-panel airflow
A suspended mesh back panel holds the main bag away from your back and leaves a gap for air. A close-fitting foam panel places the load nearer the body. Neither keeps every back dry, and the gap can change the shape of the main storage space.
The Talon's AirScape panel uses the closer approach. Do not confuse it with a suspended mesh design just because both aim to improve comfort. Choose the harness feel you prefer under a load.
Try the pockets while wearing the backpack
Reach the hip belt pockets
Large hip belt pockets can hold snacks or a phone, but only if you can use the zips on your body. Fasten the belt, put your own items inside, and try opening each side. Check whether a full pocket presses into your hip when you bend.
Hip belt pockets are a convenience, not a reason to accept a poor belt fit. Keep their contents light. A heavy hard object can change how a soft pocket feels against the body.
Check water bottle pockets from both sides
Put your usual water bottles in the side pockets and test whether they stay secure when you lean. Reaching them without taking the pack off is useful, but retention comes first. Tall bottles and short bottles can behave quite differently in the same pocket.
Side compression straps can help secure a load, yet they may cross the water bottle pockets. Find out whether you can remove a bottle without unthreading a strap. That small step matters when repeated through a long day.
Give wet layers a separate home
Mesh pockets and front stretch pockets can hold a damp shell away from a dry sleeping bag. Shake off loose water first and avoid sealing a soaked layer against other gear. Mesh pockets drain and breathe, but their exposed fabric still needs care around sharp branches.
Check the lid pocket when the bag is full
A stuffed main bag can change the angle of the lid. Make sure the lid pocket still closes and does not droop across the opening. On removable-lid packs such as the Granite Gear, decide whether that pocket earns its weight for your routine.
Top access or a front opening?
A top-loading backpacking backpack rewards a simple packing order. The Trailmade 60 adds a large U-shaped front opening, which helps when you need something from the middle. That access comes with a longer zip and some extra weight.
I would value the Trailmade 60's opening on occasional trips with a changing kit. For a settled routine, the Flash 55's lighter design may be more appealing. Easy access is useful only when it serves the way you pack.
Pack for balance and access
Protect the sleeping bag first
Give the sleeping bag a sealed dry space. A suitable pack liner or dry bag is useful because most hiking backpacks are not waterproof packs. A tough trash compactor bag can serve as a liner if it is intact, closed well, and kept clear of sharp objects.
Put dense items close to your back
Keep heavy items near the back panel and avoid a load that pulls far behind you. Cushion hard corners so they do not press into the spine. Secure water bottles and food rather than leaving them free to shift in a half-empty bag.
Keep the day's gear above the sleep kit
Snacks, rainwear, and other items you need during the walk should be easy to reach. Use hip belt pockets, a lid pocket, or an outside pocket for small items. Do not bury the rain jacket beneath the sleeping bag when the forecast looks unsettled.
Use compression straps without crushing the load
Side compression straps help reduce loose space as food and water supplies change. Tighten them enough to control movement. Do not pull so hard that they distort the back panel or make the water bottle pockets unusable.
Keep trekking poles secure
When carrying trekking poles on the bag, use the intended attachment points. Keep the tips controlled and clear of other people. Test whether the poles move when you bend or turn, especially on a small hiking backpack used for day hikes.
The best hiking backpacks should suit more than one weekend
This guide compares three overnight backpacking packs and one daypack, then explains fit, capacity, and pocket access. The aim is to help you choose a hiking backpack for the trips you actually take. A bag chosen for an imagined future expedition may be awkward on every local walk before it.
A lightweight pack with useful parts
The Flash 55 has removable parts that let you change the setup. That modular approach is useful when a pocket or lid is helpful on one trip and unnecessary on another. Keep the parts organized and check the load with the exact setup you plan to carry.
A lightweight pack can reduce what you lift, but fewer parts can also mean less support or fewer places for small gear. Weight savings are worthwhile when they preserve the comfort and access you need. The best backpacking packs balance those choices across the whole bag.
A hiking backpack for thru hiking
Thru hiking adds repeated days of wear and changing food loads. A pack that feels good with two days of food may feel quite different after a long resupply. Test the largest planned load, not just your lightest overnight kit.
For a Pacific Crest Trail section or another long route, check water carries, food storage, and the bulk of seasonal layers. Do not copy another hiker's lightweight pack without comparing the rest of the gear. Two thru hikers can need quite different backpacking packs for the same trail.
Ultralight backpacking can make long walking days easier to manage, but it is a process of matching every item to the route. Comfortable packs still need enough support when food and water are at their heaviest. Choose for that harder day.
A budget backpacking pack you can keep
The best hiking backpacks at a lower price are the ones that fit and hold the required gear without an early replacement. A simple layout can be a good choice. I would give fit more weight than a long list of pockets or a fashionable fabric.
For a first backpacking trip, try a few packs under the same load if possible. Compare the REI Co-op Trailmade 60 with other packs in your budget. Comfortable packs can feel different on different bodies, so let a careful fitting decide.
Buying a used hiking backpack
Check the shoulder straps, hip belt, frame, and main seams before buying. Look for cracked buckles, worn webbing, loose stitching, and peeling inside coatings. A durable pack still has wear points, and a low price may hide a costly repair.
Load the used hiking backpack as you would a new one. Check the water bottle pockets and front pocket for holes. Stretchy mesh pockets can look fine while empty and open into a tear when filled.
A fanny pack is optional
A small fanny pack can hold items you want when the hiking backpack is off. It may also compete with the hip belt or hang in an awkward spot. Try both together before adding another pouch to a system that already has hip belt pockets.
If the existing external pockets work well, you may not need the extra bag. The best hiking backpacks let you keep a simple routine. More storage is useful only when it solves a problem you have.
Keep backpacking packs ready for the next trip
Empty every zipper pocket
Food crumbs, wrappers, and damp gloves often hide in a zipper pocket after a trip. Check the hip belt pockets, lid, side pockets, and main bag. Remove water bottles too, even if the pack will be used again soon.
Clean mesh pockets gently
Brush loose dirt from mesh side pockets and follow the maker's wash advice. Do not scrub stretch mesh with a stiff tool. Let water bottle pockets dry open so trapped dampness does not sit against the body fabric.
Check straps before loading
Look along the shoulder straps, compression straps, and load lifters for damage. A worn strap deserves a repair before another backpacking trip. Keep the pack away from sharp tools while storing other outdoor gear around it.
Recheck fit when the kit changes
A new sleeping bag, a heavier shelter, or extra water bottles can change the load. Put the updated backpacking gear in the bag and repeat the fitting checks. A hiking backpack that worked last season may need a different packing order now.
Before you settle on a backpack
Can an overnight pack work for day hikes?
Yes, if it compresses well and stays stable with the smaller load. It may still be heavier and bulkier than you want. I would use the pack I already own for a few walks before buying a second one just for a label.
Are men's and women's packs different?
They can differ in torso range, shoulder shape, and hip belt shape. Try the harness that fits you, regardless of the label. Check the exact size and specifications because those can change within a model family.
Should I buy the largest size I can afford?
No. Buy enough space for the intended gear, with sensible room for food and layers. Extra room can make it too easy to add things you do not need. A too-large pack may also fit your torso poorly.
Which backpack would I choose?
For an overnight kit, I would try the Flash 55 first, then compare its loaded fit with the Trailmade 60 or Crown3 60. For day hikes, I would start with the Talon 22. The deciding moment is when the full pack sits well on your hips and shoulders. Let that result beat the name on the bag.